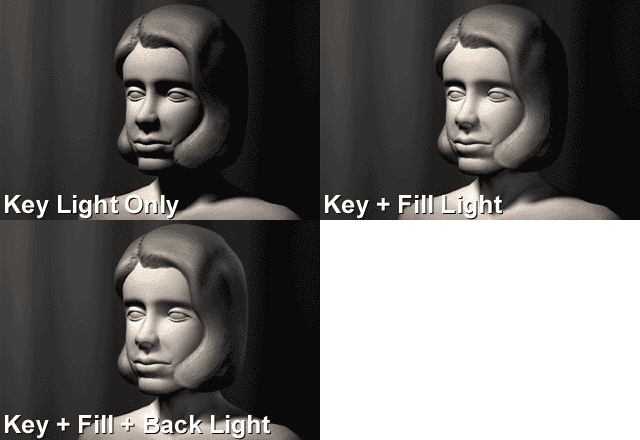
 After one jumps into posting videos on YouTube and other on-line services, it's only a matter of time before you start wanting better quality. While a better camera can help, most schools don't have the money to buy high-end equipment.
The most important aspect of video is audio. Unless you are video recording mime or interpretive dance, the audio is important. If you are providing instruction, the audio is critical. We'll cover audio at some later date.
More important than the quality of the camera is lighting. While a high-end camera might be able to correct for common mistakes, it's always better to avoid mistakes in the first place. 3d Rendering has a nice tutorial on how to set up an effective lighting system called "three point lighting." Basically, the idea is to light from the front with a strong light and use a second light at the subject's side so as to create some natural shadows. A back light creates a sense of distance from the back wall. While there are three-point lighting systems on the market, you might be able to get away with less if you have a reliable source of light coming in from a window. You may also be able to cut down on lights if you use a reflecting board to bounce light from where a second light might normally be placed.
The most important thing is to try lots of combinations to see what works best for your environment and subjects. For example, how you would light for a school play would be very different from an one-on-one interview. The concept of three-point lighting is the same but the equipment and angles would differ.
Good luck and have fun!
T


0 comments:
Post a Comment